Easy and Healthy Mediterranean Lamb Bowls

ashley glass blog

When you think of a summer dinner, what sounds GOOD? For me I tend to lean towards fresh, light, and usually on the healthier side. There is something about these HOT and humid Kentucky days that make my taste buds crave less calories.

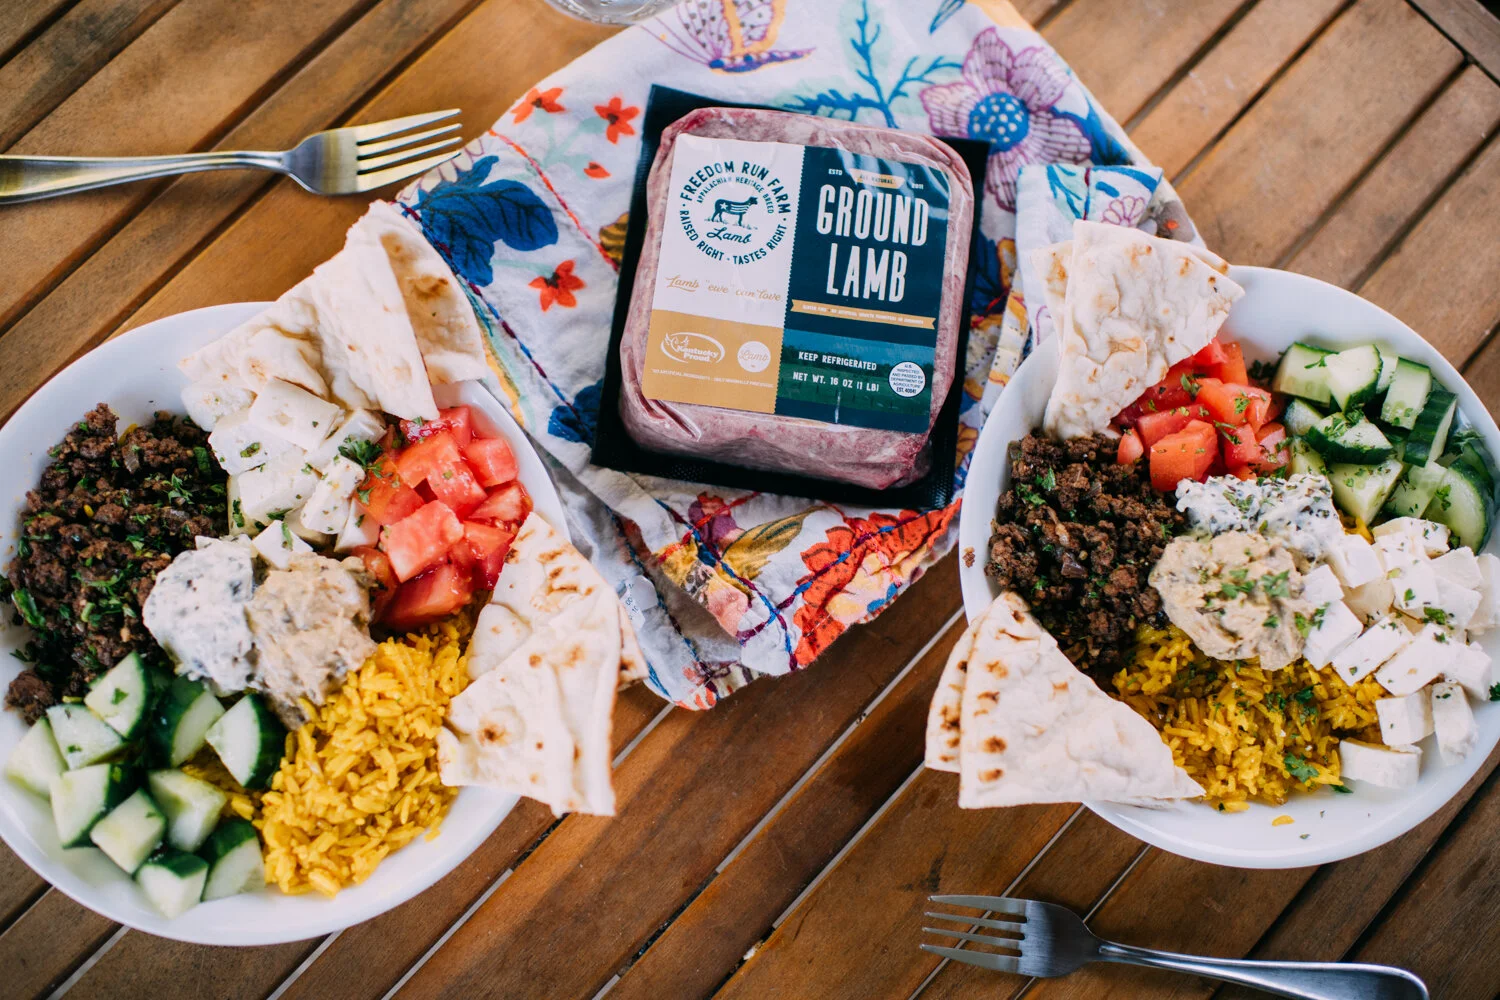
We recently partnered with Kroger to show how they support our local brands, and while this blog post is NOT sponsored, it is thanks to them that we found and created this dish and I wanted to share! I haven’t eaten a lot of lamb in my lifetime, but that’s what we went with when working with Kroger, to help promote Freedom Run Farm. Let me tell you, this lamb was DELICIOUS!! We looked up recipe ideas for working with ground lamb and we were led to Fox and Briar’s blog. She introduced us to this INCREDIBLE Mediterranean Lamb Bowl and I had to share with YOU.

ashley glass blog

For the Spiced Ground Lamb:

  • 1 pound ground lamb

  • 1 tablespoon olive oil

  • 1/4 cup finely diced onion

  • 4 cloves garlic, finely minced

  • 1 teaspoon paprika

  • 1 teaspoon allspice

  • 1/2 teaspoon red pepper flakes

  • 1/4 teaspoon ground ginger

  • salt to taste

  • pepper to taste

  • 1/4 cup fresh mint, chopped plus more for garnish

  • 1/4 cup flat leaf parsley, chopped + a little more for garnish

ashley glass blog

Ingredients for the Bowls:

To Make The Spiced Ground Lamb:
Heat a large sauté pan over medium heat and add the olive oil. When the oil is hot, add your onions and garlic.  Sauté all of this for five minutes, until starting to soften and then add the ground lamb.  Brown the lamb until cooked through. Add paprika, allspice, red pepper flakes, ginger, salt and pepper.  Mix until fully combined, cook for one or two minutes. Remove from heat and stir in fresh herbs. To assemble the bowls, layer the Turmeric Rice, top with some of the spiced lamb, tomatoes, cucumbers, hummus, and feta. Sprinkle it with fresh mint and parsley! (It’s DELICIOUS!)

ashley glass blog

I think Asa has made this almost every week since discovering this recipe. He put his own little touches on it, but overall this comes from Fox and Briar. Make this for your next date night, family night, or when you have some friends over. The vibrant Turmeric Rice with the veggies and cheese and pita is SUCH a fun and refreshing meal. We bought some hummus and spinach dip to use on the pita’s, and every bite was filled with so much YUM! Let me know if you make it, I want to hear your spin on it and how/if you enjoyed it as much as we do.

Happy Summer dining, Friends! Stay safe stay well!

xx

Your New Best Friend: Hot Honey Pizza

ashley glass blog

Who doesn’t love a delicious homemade pizza?! ‘Make me a pizza and tell me I’m pretty,’ is basically my quarantine love language. Then again… so are cinnamon rolls, cookies, and well, anything my husband cooks. But because we were in the pizza mood and I actually snapped some photos, we wanted to share this deliciousness with you, so here it is!!!

CRUST:
You can make your own crust or just use store bought (we used Biboli brand for this pizza but sometimes Asa gets dough at Trader Joe’s and makes his own crust with that)
Directions:
Start with a base of marinara sauce which is more flavor than traditional pizza sauce.
To that, add dollops of creamy ricotta cheese
Dice some pepperoni (no big pieces here!)
Cover the top with freshly grated mozzarella cheese
Bake in an oven that was pre-heated to 425-degrees until the crust is golden brown and the cheese is melted
Remove from the oven
Immediately top with a handful or two of fresh, spicy arugula
Drizzle with a generous helping of HOT HONEY (we found ours at Target in the honey aisle, and no this isn’t sponsored, I am just obsessed!!)

What are some of your favorite pizza toppings?! You HAVE to try this. I am basically putting this hot honey on ALL the things (fish tacos, salmon, sautéed sliced honey glazed carrots….) Let me know if you make it and whatcha think! Want more recipes?! E-mail me and let me know what you’d like to see!

Delicious, Simple, Must Make Cinnamon Rolls

ashley glass blog

Making homemade cinnamon rolls has always been an intimidating thought for me…it always seemed like so much dang work. I won’t say this was incredibly fast, but it’s a straightforward recipe and I am so excited to share it with you.

Here’s how to make the dough. Make sure you have these ingredients:
-1 cup warm milk (heated to 110-degrees)
-4.5 cups flour
-2 eggs room temperature
-1/3 cup melted butter
-1 teaspoon salt
-1/2 cup white sugar
-2.5 teaspoons yeast

Dissolve the yeast in the warm milk in a large bowl. Mix in the sugar, butter, salt, and eggs. Add flour and mix well. Knead the dough into a large bowl, using your hands dusted lightly with flour. Put in a bowl, cover, and let rise in a warm place for about an hour, or until it is doubled in size.

We discovered our kitchen was too chilly. We had tried to cover the yeast as directed and set a timer for an hour. It hadn’t risen at all. So my husband googled a solution and read that we should get the oven warm, not hot, so around 100-degrees. He did that for a minute or so, turned the oven back off, and closed the bowl inside. After about an hour inside the oven (remember, not HOT, just warm) the dough rose just as it needed to!

What’s next…
You’ll need these ingredients for the delicious, mouth watering, filling:
-1 cup of packed brown sugar
-2.5 Tablespoons ground cinnamon
-1/3 cup melted butter

After the dough has doubled in size, turn it out on a lightly floured surface, cover, and let rest for 10 more minutes. In a small bowl, combine the brown sugar and cinnamon. Roll dough into a 16x21 rectangle. Brush the dough with melted butter, sprinkle with sugar/cinnamon mixture. Roll up the dough starting on the long side and cut into 12 rolls. Place them into a lightly greased 9x13 inch baking pan. Cover and let rise until nearly doubled (about 30 minutes). Preheat the oven to 350-degrees.

Bake rolls until they are golden brown (about 20 minutes). While the rolls are baking, beat together the frosting mixture:
-1 (3oz) package softened cream cheese
-1/4 cup softened butter
-1.5 cups powdered sugar
-1/2 teaspoon vanilla extract
-1/8 teaspoon salt

Here are what the rolls looked like after they rose, and before they were baked:

Here’s where I get to be completely honest with you, AND shock you. I did not make these.

My husband did.

I know, I know, I know. That is so shocking because I am SO crafty in the kitchen and I do so well there. But I just wanted to give credit where credit is due. I was all ready to help earlier in the day, but when the dough took longer than expected, we weren’t sure how this would all turn out aaaand I needed to head to the barn. So this is all Ace. And when I came home from the barn, we had these bad boys for dinner.

The kids were especially excited about this dinner option. Seriously, these cinnamon rolls were so soft, the frosting was perfection, and the sugar and cinnamon was all bubbly and caramelized. If you are someone who can wake up and make these beauties bright and early, go for it! But I am so glad we had these for dinner and I think they would be perfect for a brunch or girls night too. This is based entirely on the fact that I despise mornings, and my husband who IS the cook of the house, said that this was a little more work than he would normally want to do on the average morning for breakfast ;)

ashley glass blog

It is thanks to the Bakerlady that I found this recipe on Pinterest. And you can find her blog and post here! PS: who doesn’t want buns of cinnamon?! Here’s to all the cinnamon rolls and to the wonderful people you enjoy them with!

Soft & Chewy M&M Spring Cookies

ashley glass blog

It’s been a bit since I’ve been in the kitchen, so whipping up these soft and chewy cookies was quite the treat for me and my family! The kids have loved to help me bake since they were teeny tiny and this day was no different. So as the sun shone brightly outdoors and the open windows brought in a cool breeze, we got busy. This recipe is super easy and you could even add your own little spin, such as white chocolate chips or funfetti sprinkles—you decide! We used spring colored M&M’s, and followed this recipe to a tee!

Here’s what you need and hopefully you have in your pantry:

  • 1/2 cup butter

  • 1/2 cup brown sugar

  • 1/4 cup white sugar

  • 1 large egg

  • 2 teaspoons vanilla extract

  • 1 2/3 cup flour

  • 1/2 teaspoon baking soda

  • 1/2 teaspoon salt

  • 1/2 cup white chocolate chips

  • 1/2 to 1 cup pastel M&M candies or candies preferred

And here’s how to make them:

  • Preheat oven to 350 degrees.

  • Place parchment paper on top of baking sheets (or set aside un-greased baking sheets)

  • Add butter to a microwave dish and microwave for 25 seconds or more until butter is partially melted, like 1/2 of the butter should appear melted while the other half still looks like a melted butter stick.

  • Add the sugars (brown and white) to a large mixing bowl with the partially melted butter and stir well to combine.

  • Next, beat in the egg and vanilla until just combined.

  • Add in the flour, baking soda, and salt and mix until just combined.

  • Add in your candies of choice (I just used a 1c. measuring cup and then gently stirred with our standing mixer. Don’t over beat or stir though)

  • Use a large cookie scoop (3 tablespoons) to scoop out 12 cookies or use a medium sized cookie scoop (1 1/2 tablespoons) for 18-20 cookies and arrange them evenly on baking sheet .

  • Bake for 10 minutes for medium sized cookies and 13-15 minutes for larger cookies. Cookies will still be slightly underdone when you remove them from the oven. Make sure not to over bake for soft and chewy cookies. Cookies will not spread much while baking. (I followed this precisely and ten minutes was the perfect amount of time!)

  • Let sit on baking sheet for 5 minutes before eating. Allow cookies to cool completely before storing in an air-tight container for up to 4-5 days.

The kids have been enjoying these as an after dinner treat. It’s too bad we aren’t really supposed to share food or common spaces with people, because we would have loved to share with neighbors! I guess it means more for me though, so I won’t complain too much ;) I highly, highly encourage you to make these. Treat yourself to a moment on your deck or porch, cookie in hand. Stay well, friends and happy baking!

ashley glass blog